

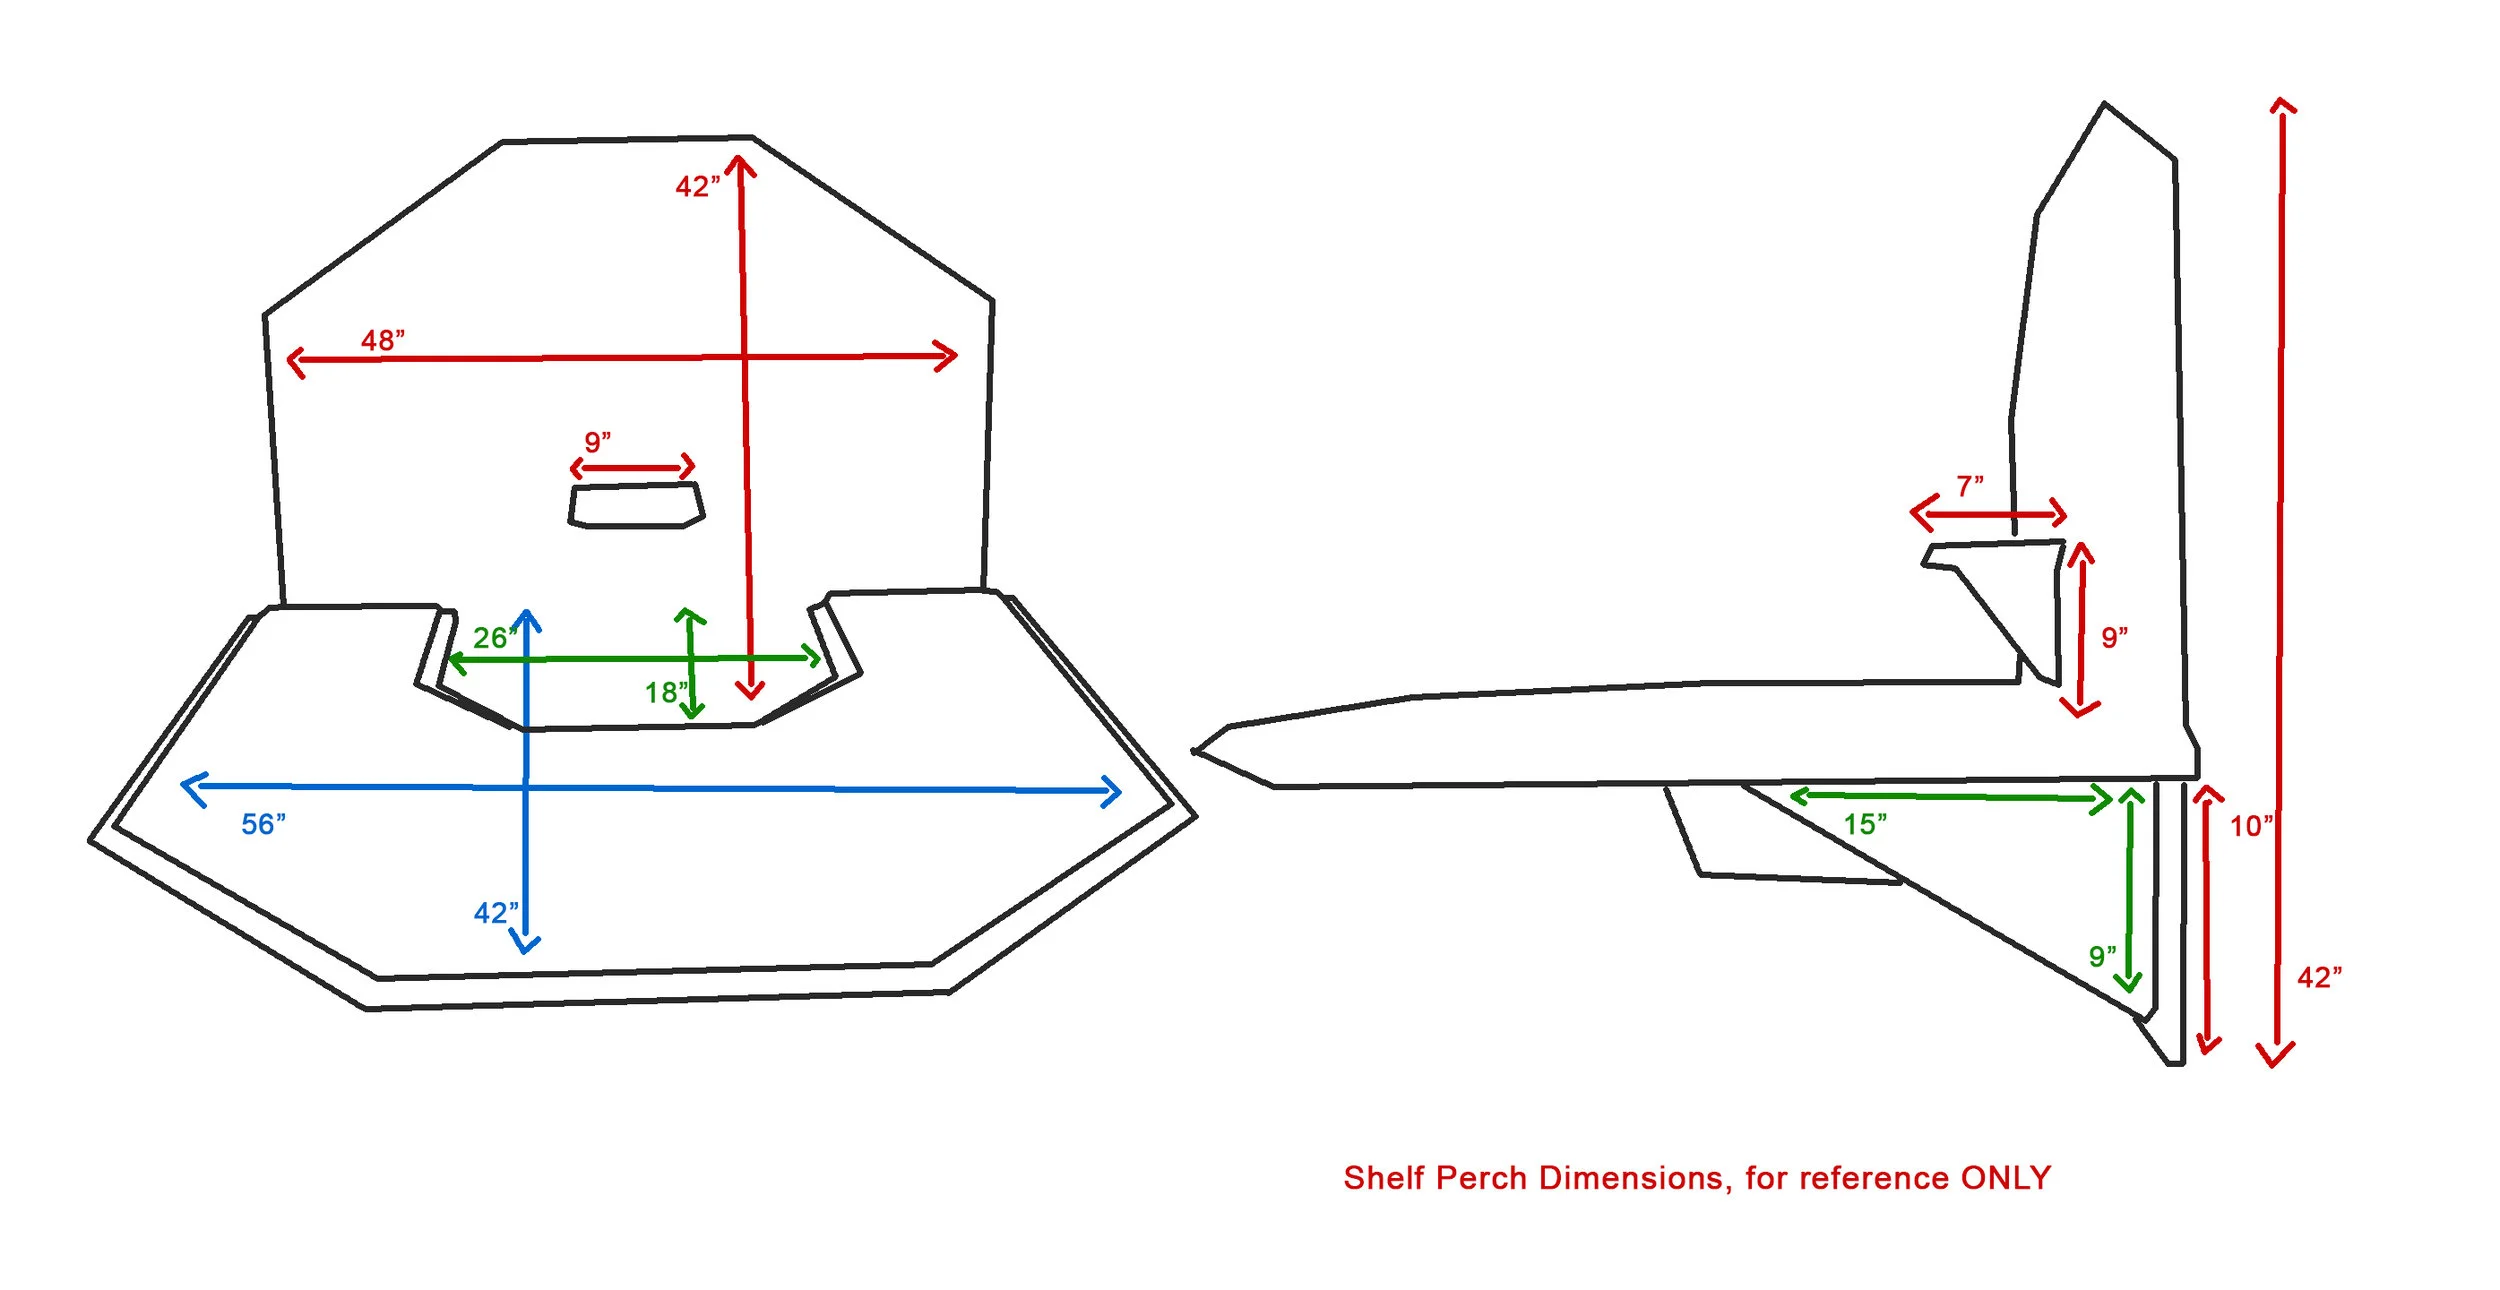
Thinking about building a shelf-perch for your falcon? Feel free to use our video for reference!
A Word on Our Perch (project information following)
There are various reasons for keeping a falcon in your house, garage, or even in your mews on a shelf-perch. There is of course the age-old debate between free-lofting and full-time tethering falconry birds of prey, but we’re not interested in entering that debate or making a case for shelf-perches. For those of you who have decided to go the route of a shelf-perch, even if just to have on hand for when other falconers visit, etc., hopefully this video is helpful!
Again, our video is not an authoritative work on shelf-perches, it is to be used as a reference. That being said, we based our design on the designs of 11 other shelf-perches used long-term by other master falconers, so you can rest assured the concept is tried and true.
The falcon we are keeping on our perch is a thousand gram tiercel 7/8 gyr-peregrine, for reference. You may be interested in making some changes to better suit your specific bird’s needs.
Remember, it is VITAL to always tether your bird to a shelf-perch LEASH LENGTH AWARE. Your falcon should be restricted to within 4-5 inches of the perch’s outer edge to avoid problems.
Basic specifications and information on the perch we built in the video:
Materials Used:
3/8” 4’x8’ Sanded Plywood
1qt Wood Stain + Poly
Unfinished Wood Traditional Bracket 7”x5”x3.5”
Screw Eye
20’ Pre-Finished 3/4” Quarter Round Moulding
4”x1”x8’ Board (how we mounted it to the wall)
Genuine Astroturf
2 Part Epoxe
Wood Glue
Small Staples
#8 x 3” Drywall Screws (for mounting brackets to the studs in the wall)
#8 x 1-3/4” Construction Screws
#6 x 1-1/4” Drywall Screws
Tools Used:
Skil-Saw
Jig Saw
Miter Saw
Router
Screw Gun
Staple Gun
Paintbrushes (for applying stain & polyurethane)
Level
Measuring Tape
Carpenter Square
Scissors
Palm Sander (or whatever sanding method you prefer)
Pneumatic Nailer (for attaching quarter-round)
Again I’d like to give a special THANK YOU to Adam Davis of toothntalon.com for providing our aluminum Falconry Told logo accent piece… Check out the phenomenal work they’re doing over at Tooth N’ Talon building state-of-the-art giant hoods and more!
If you appreciated this video and would like to support our work going forward, your donations are most welcome and appreciated! Learn about the many ways you can back our work here.
Or leave a kind tip right on PayPal!